- To create a simple AR app in Unity where you can tap to place an object without writing any script, you can use Unity’s AR Foundation and ARKit or ARCore (depending on your target platform). AR Foundation provides a framework for building augmented reality (AR) experiences across different AR devices.
- Our Unity version : 2022.3.16f1 LTS
Setting Up a Unity Project:
- Open Unity:
-
- Launch Unity Hub if you have it installed.
- Click on the New Project button to create a new project.
-
- Project Setup:
-
- Choose a project name and location.
- Select the template for your project. For a 3D project, choose the 3D template.
-
- Create Project:
-
- Click on the Create Project button to create the project.
-
Switching Platform:
For Android:
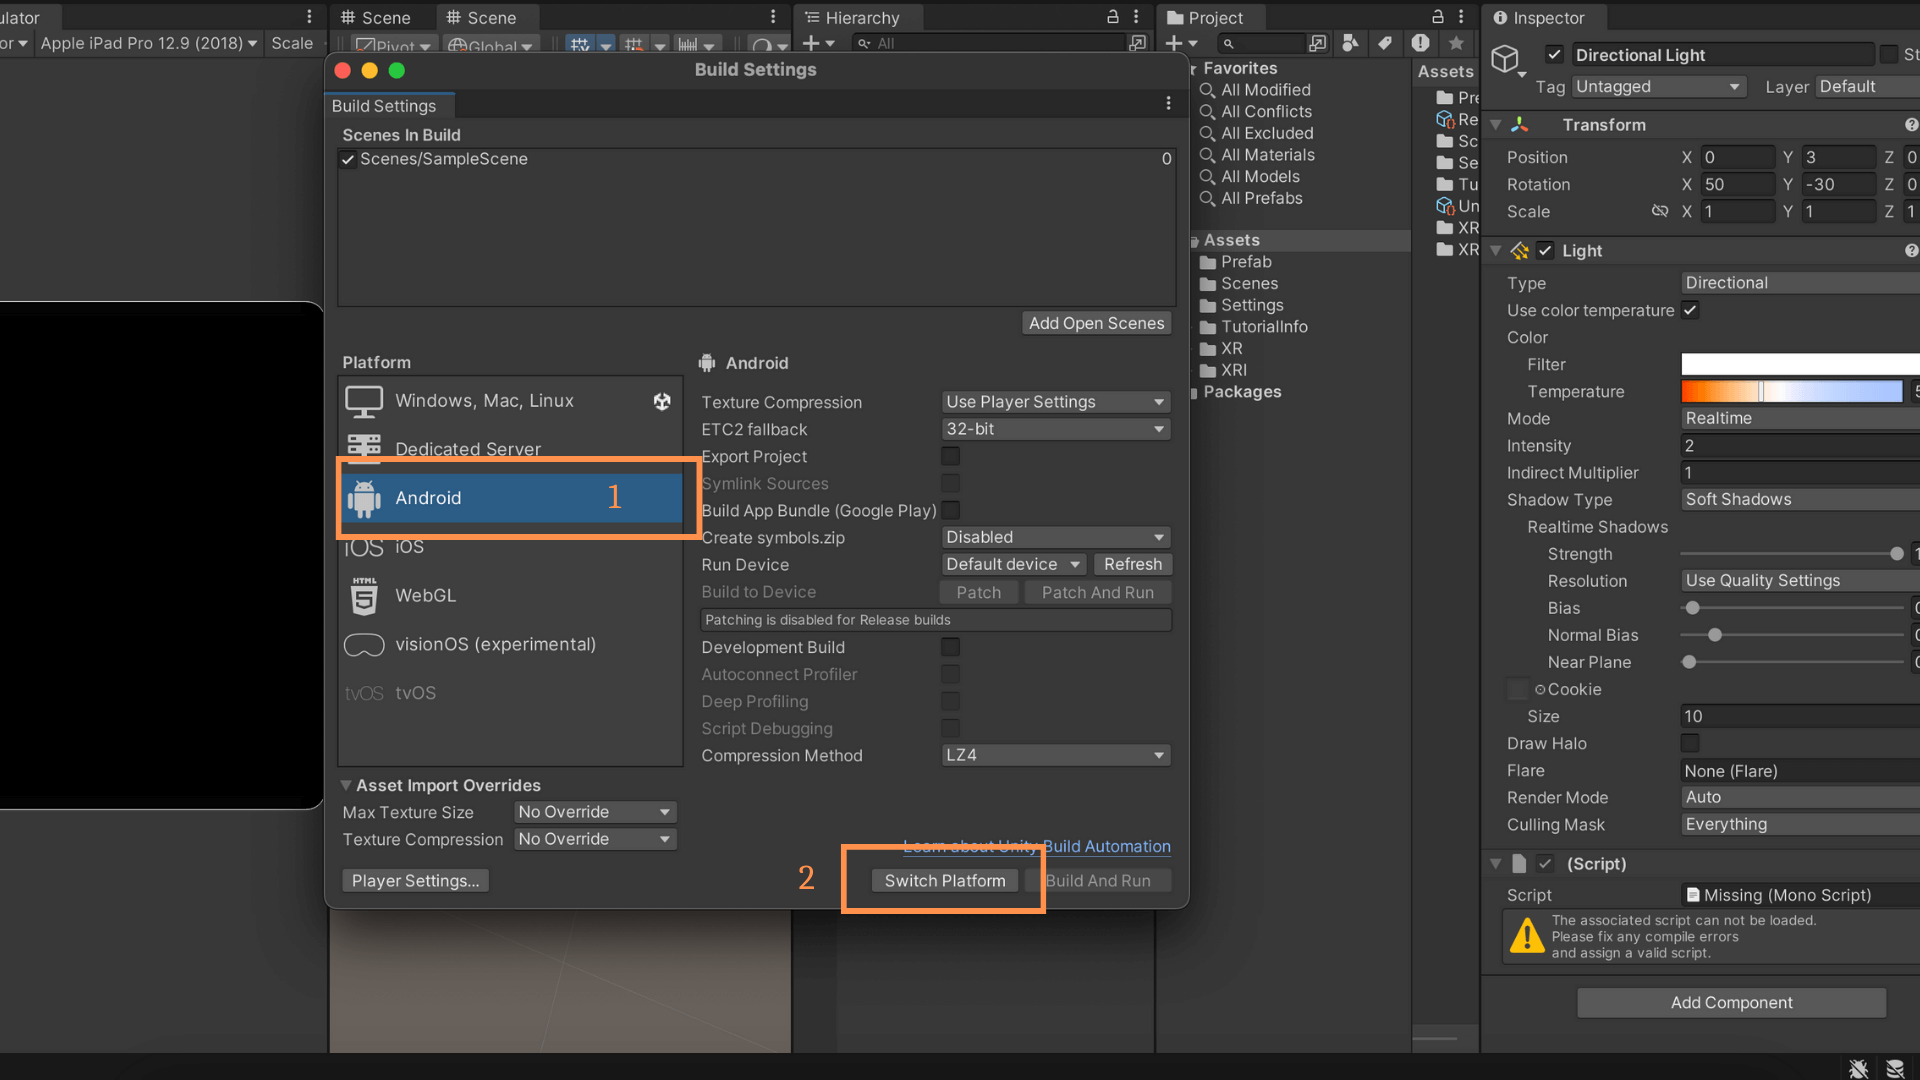
- Open Build Settings:
-
- In the Unity Editor, go to File > Build Settings.
-
- Select Android Platform:
-
- In the Build Settings window, select the Android platform.
- Click on Switch Platform.
-
- Configure Player Settings:
-
- After switching to Android, click on the Player Settings button.
- Configure the settings such as package name, version, etc., in the Inspector window.
-
For iOS:
- Open Build Settings:
-
- In the Unity Editor, go to File > Build Settings.
-
- Select iOS Platform:
-
- In the Build Settings window, select the iOS platform.
- Click on Switch Platform.
-
- Configure Player Settings:
-
- After switching to iOS, click on the Player Settings button.
- Configure the settings such as package name, version, etc., in the Inspector window.
-
Install XR Plugin Management:
- Open your Unity project.
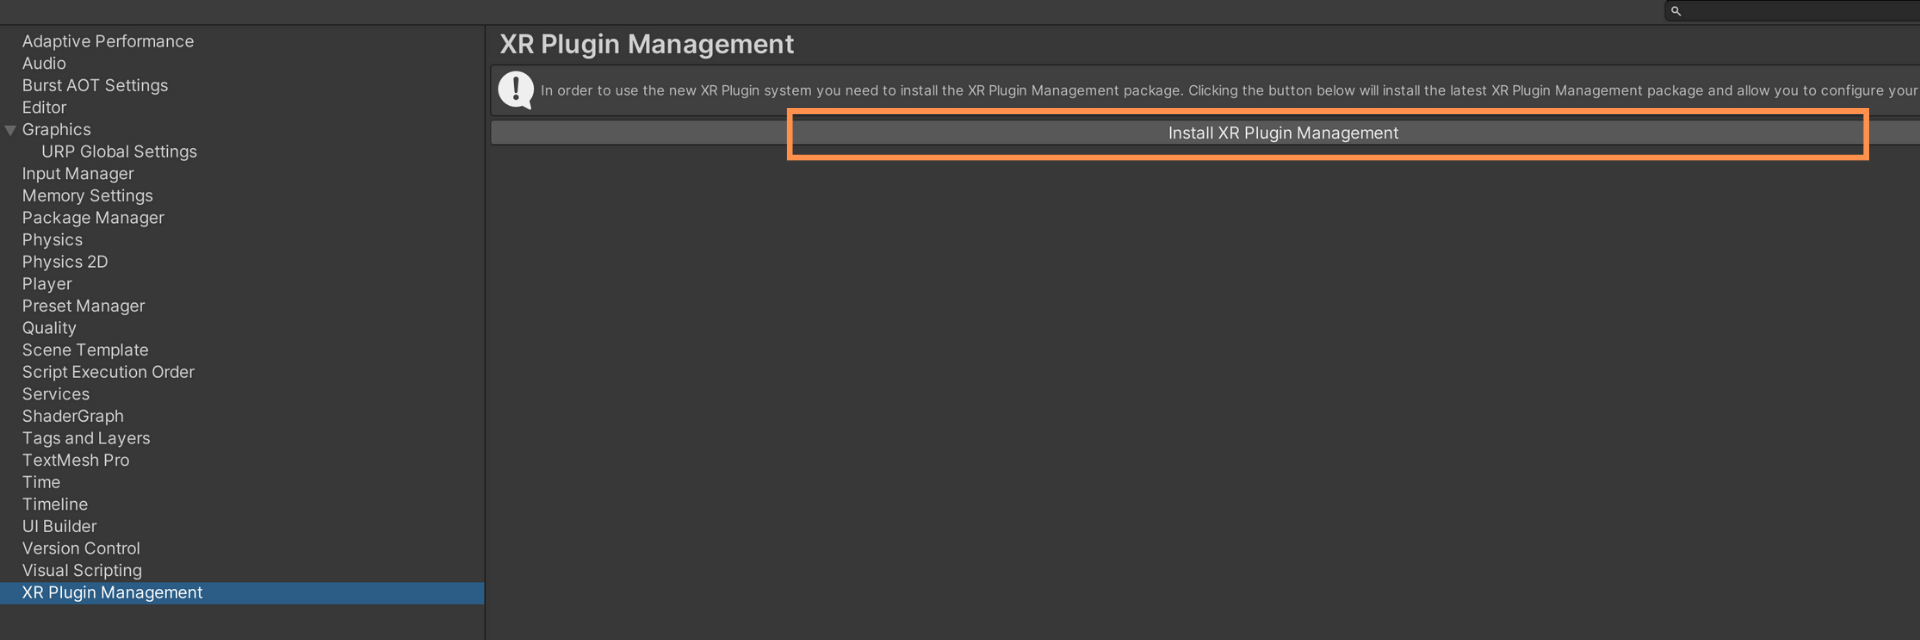
- Go to Edit > Project Settings.
- In the Project Settings window, navigate to XR Plugin Management.
- Click on Install XR Plugin Management. This package helps you manage different XR (Extended Reality) platforms.
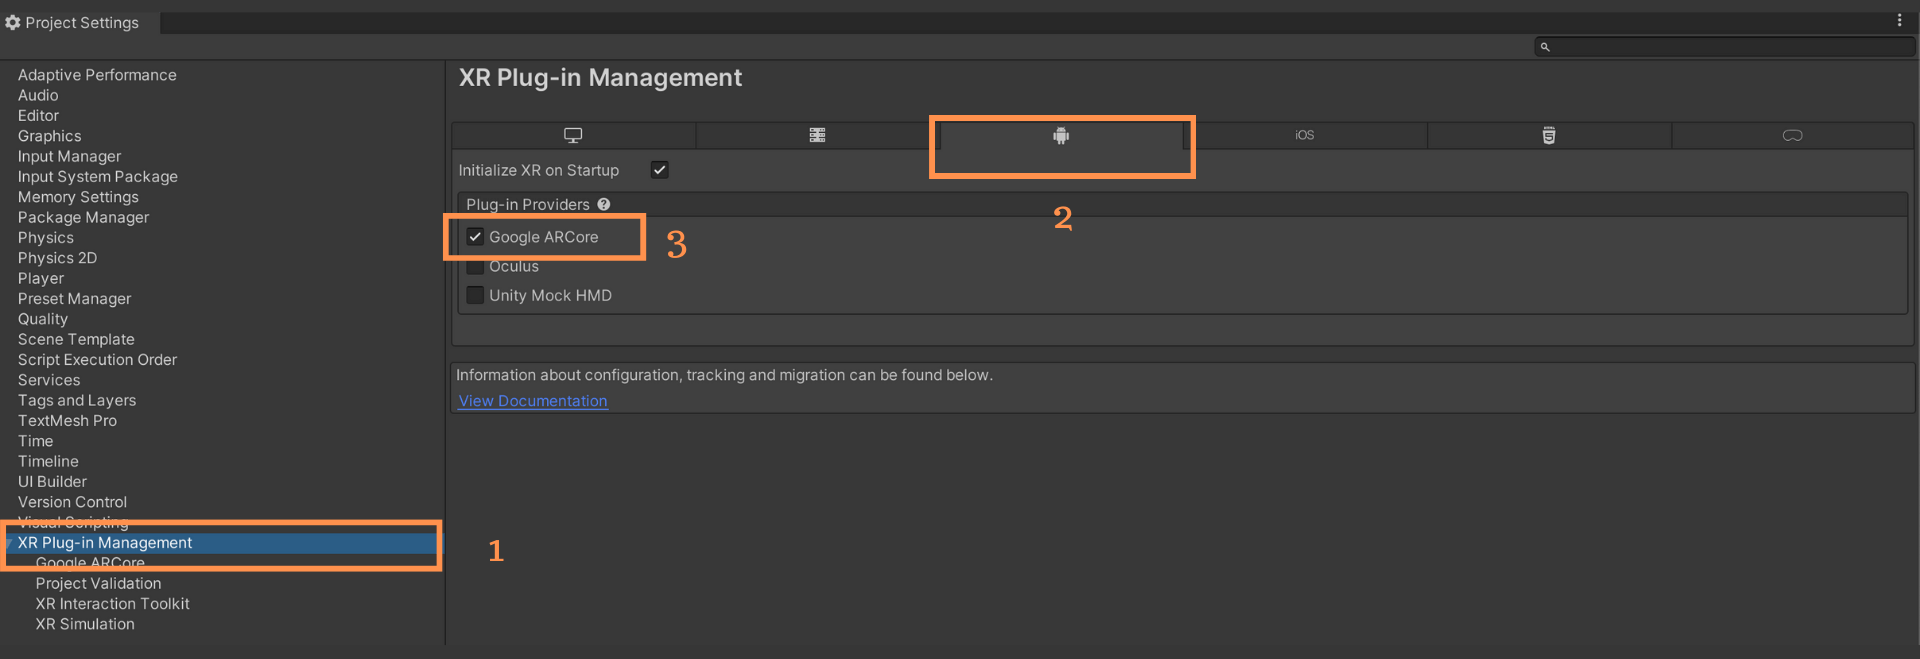
Install Google ARCore for Android:
- In the XR Plugin Management window, navigate to the Android tab.
- Check the box next to Google ARCore to select it.
- Unity will automatically start importing the selected plugin.
Install ARKit for iOS:
- In the XR Plugin Management window, navigate to the iOS tab.
- Check the box next to ARKit to select it.
- Unity will start importing the ARKit plugin for iOS.
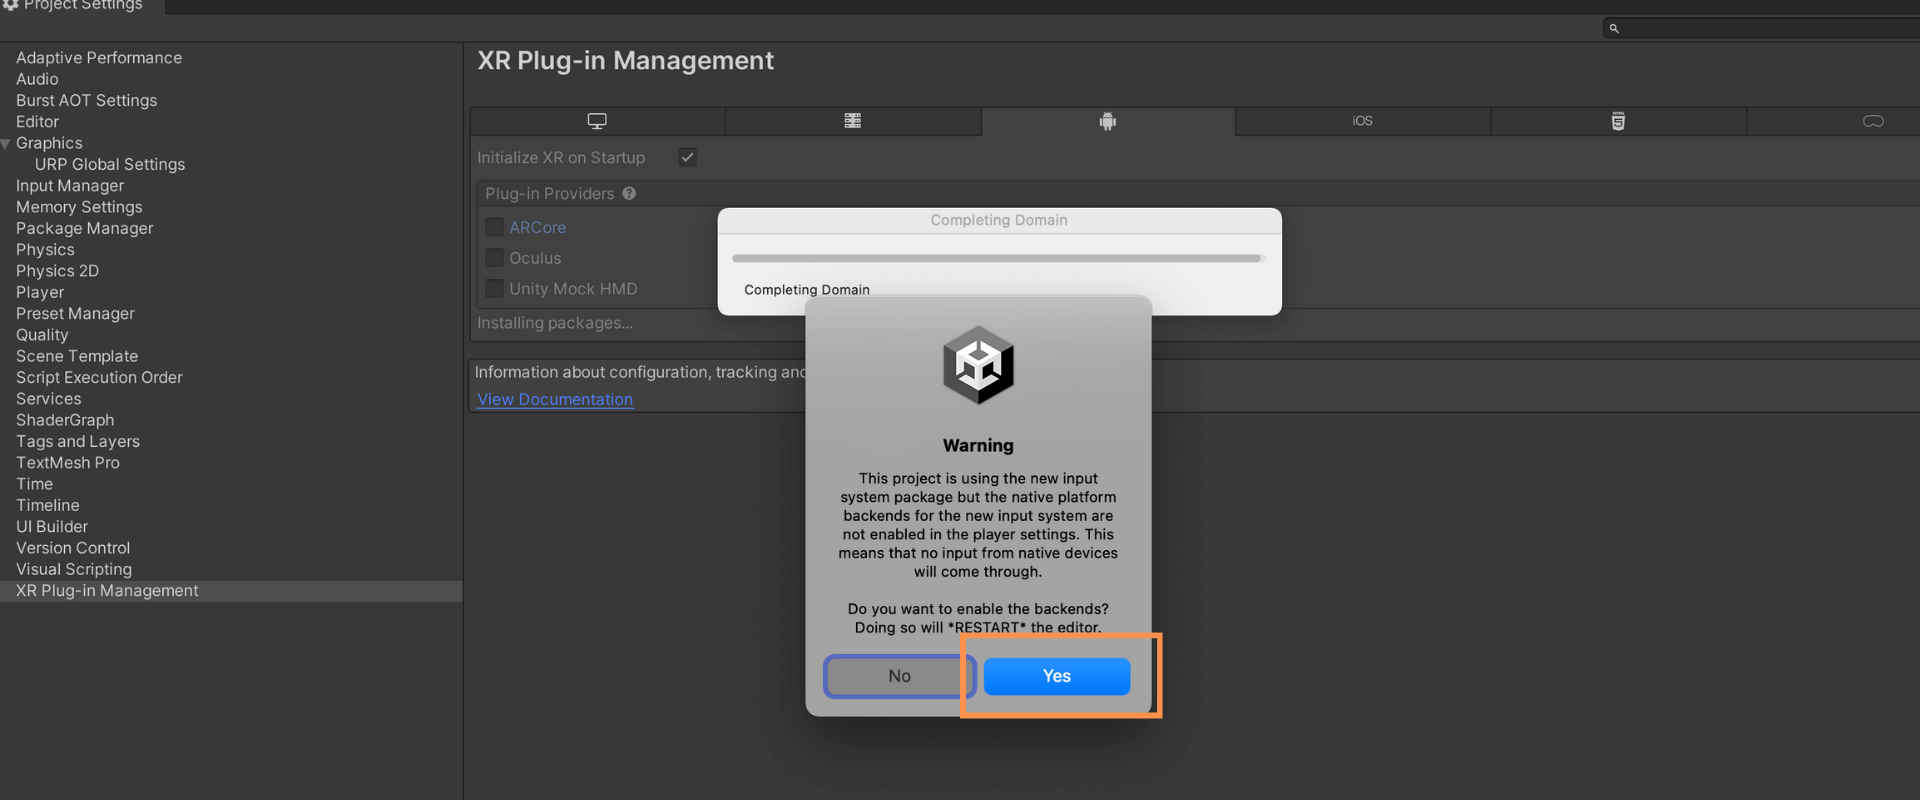
Handle Input System Warning:
- During the import process, Unity might prompt you about importing a new Input System.
- You’ll likely see a warning message. If it asks you whether you want to switch to the new Input System, select YES. The new Input System is more modern and recommended for XR development.
- Confirm any additional prompts or settings related to the new Input System.
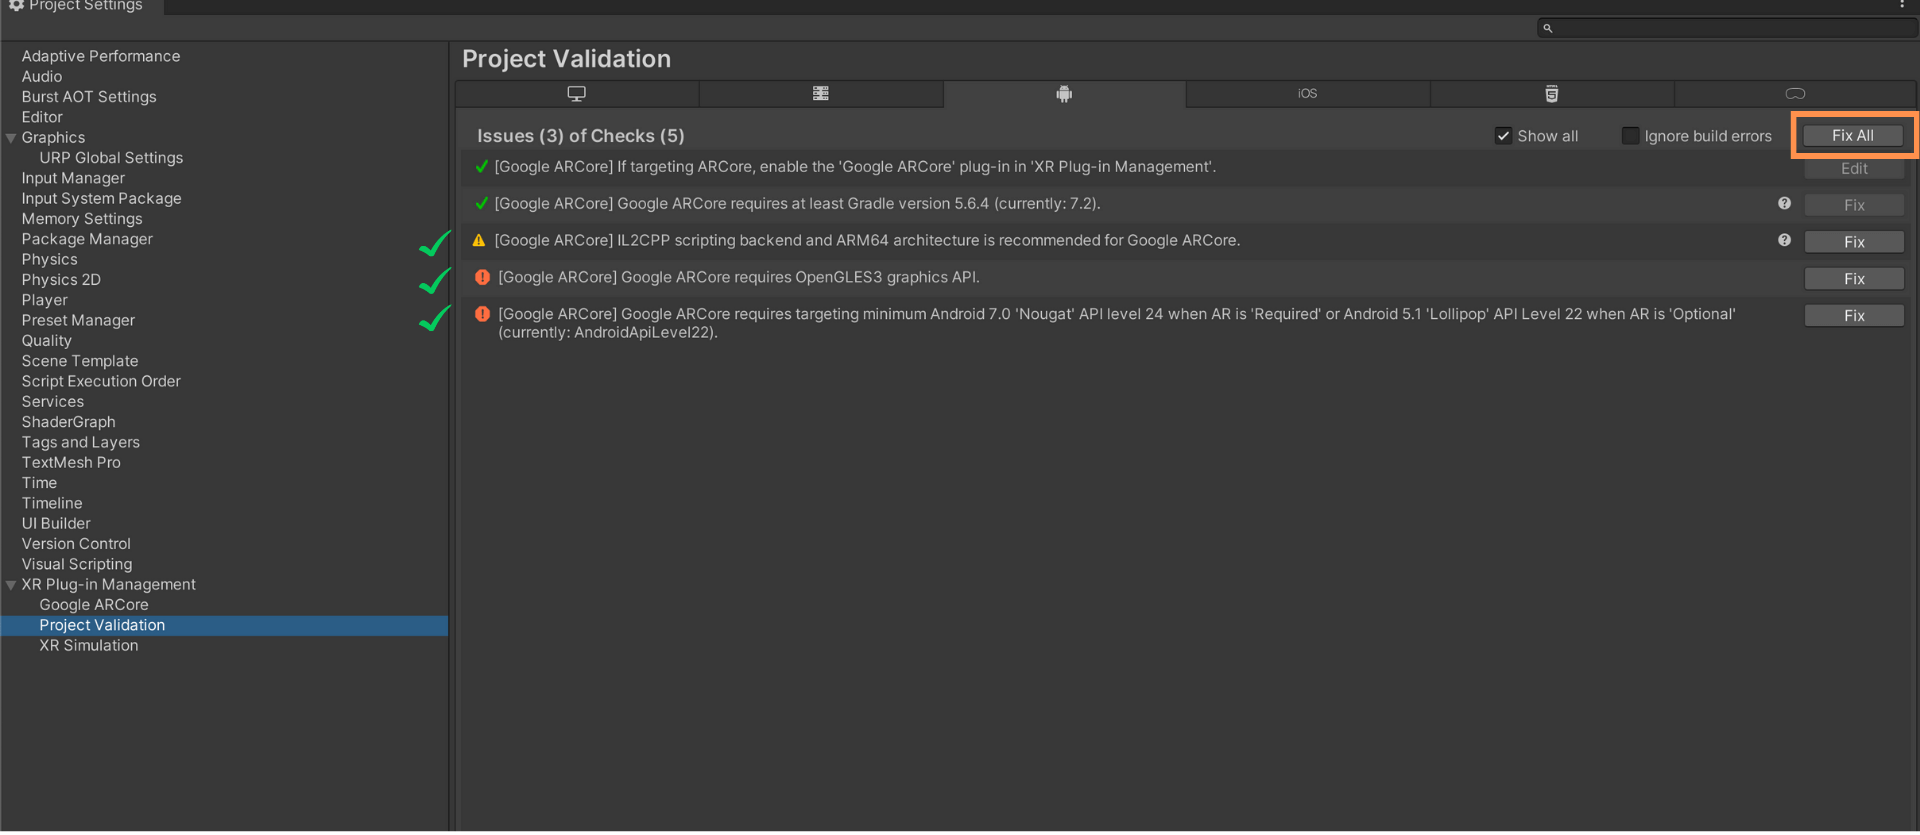
Project Validation:
- Open PlayerSettings > XR Plugin Management > Project Validation in Unity.
- Review any ARCore-related warnings/errors.
- Click FixAll to apply suggested fixes.
- Confirm and follow prompts for settings like Graphics API and Minimum Android Version.
Unity Scene Setup
- Delete Unnecessary Objects:
-
- Open your Unity scene.
- Delete all objects in the scene except the Directional Light Game Object, ensuring a clean slate for your AR experience.
-
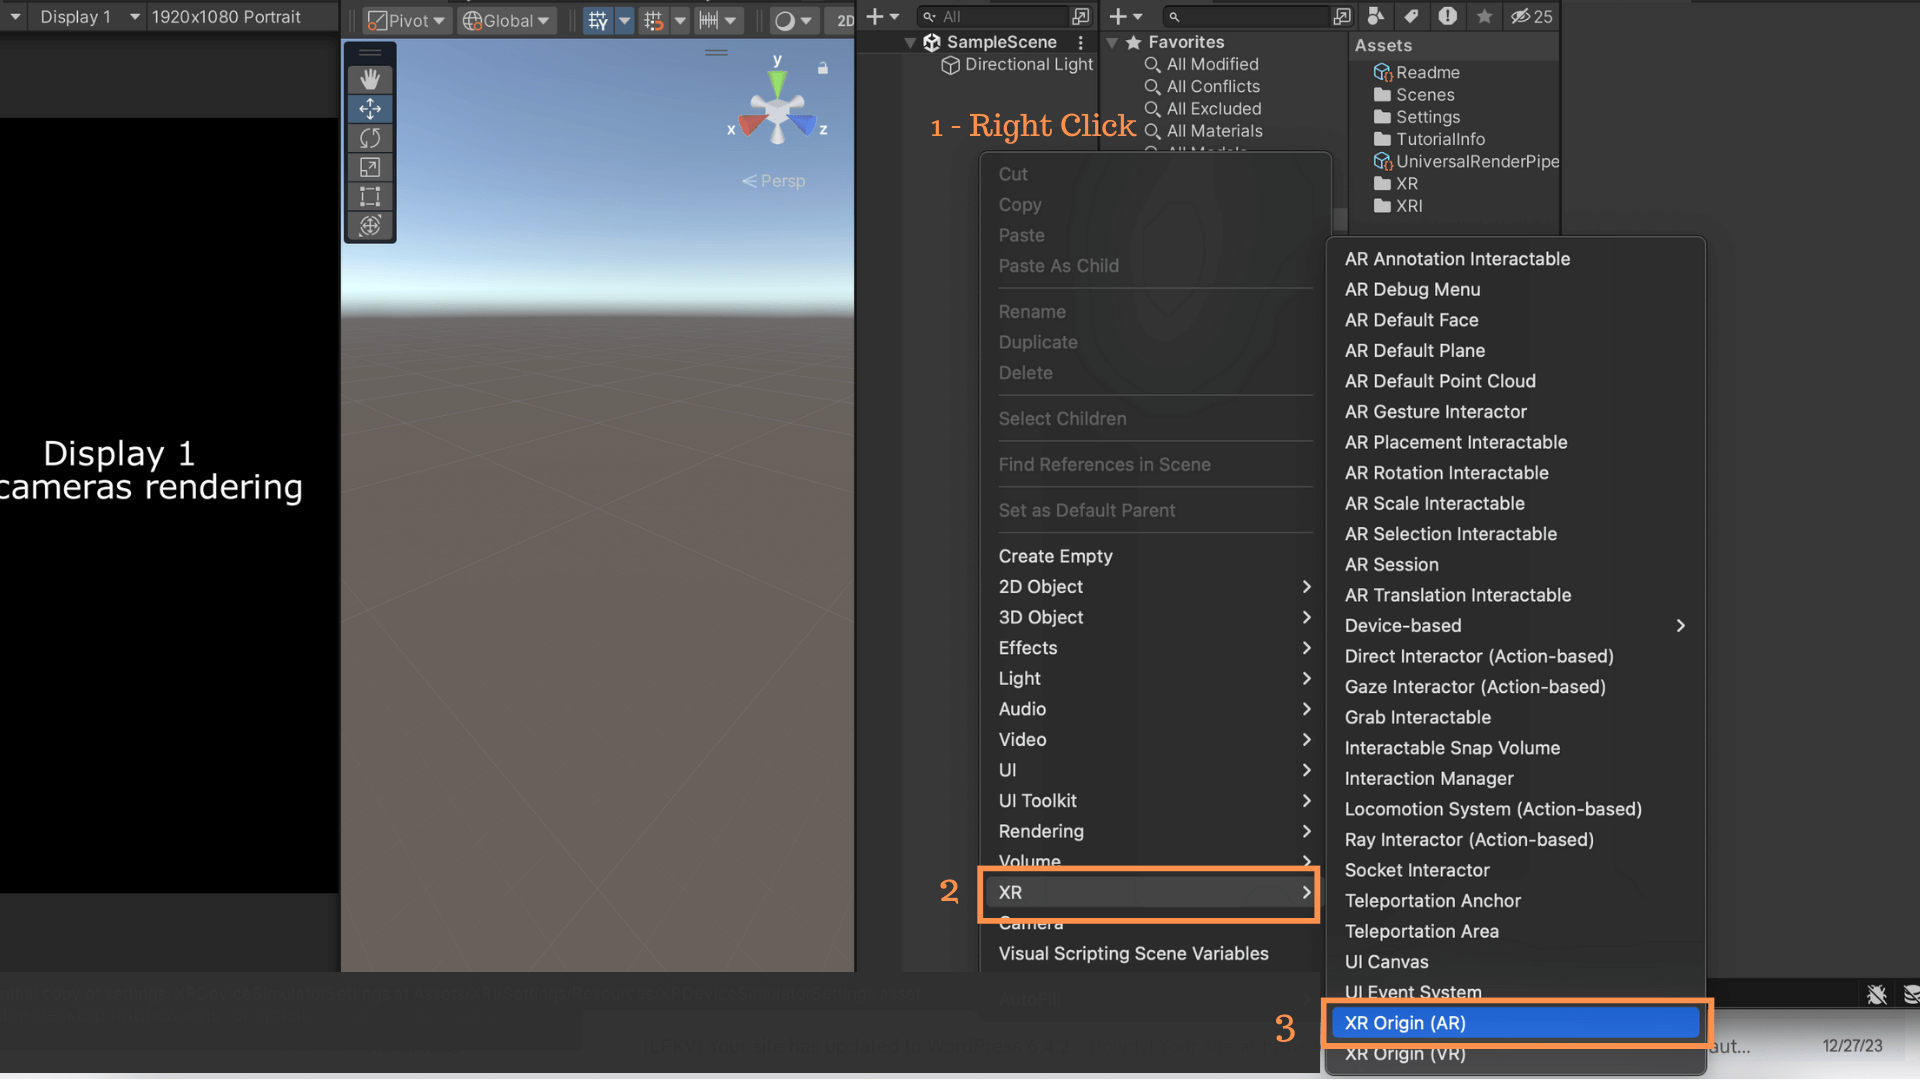
- Add XR Origin (AR):
-
- Right-click in the Hierarchy window.
- Go to XR > XR Origin (AR) and add it to the scene.
- This sets up the XR Rig necessary for AR interactions.
-
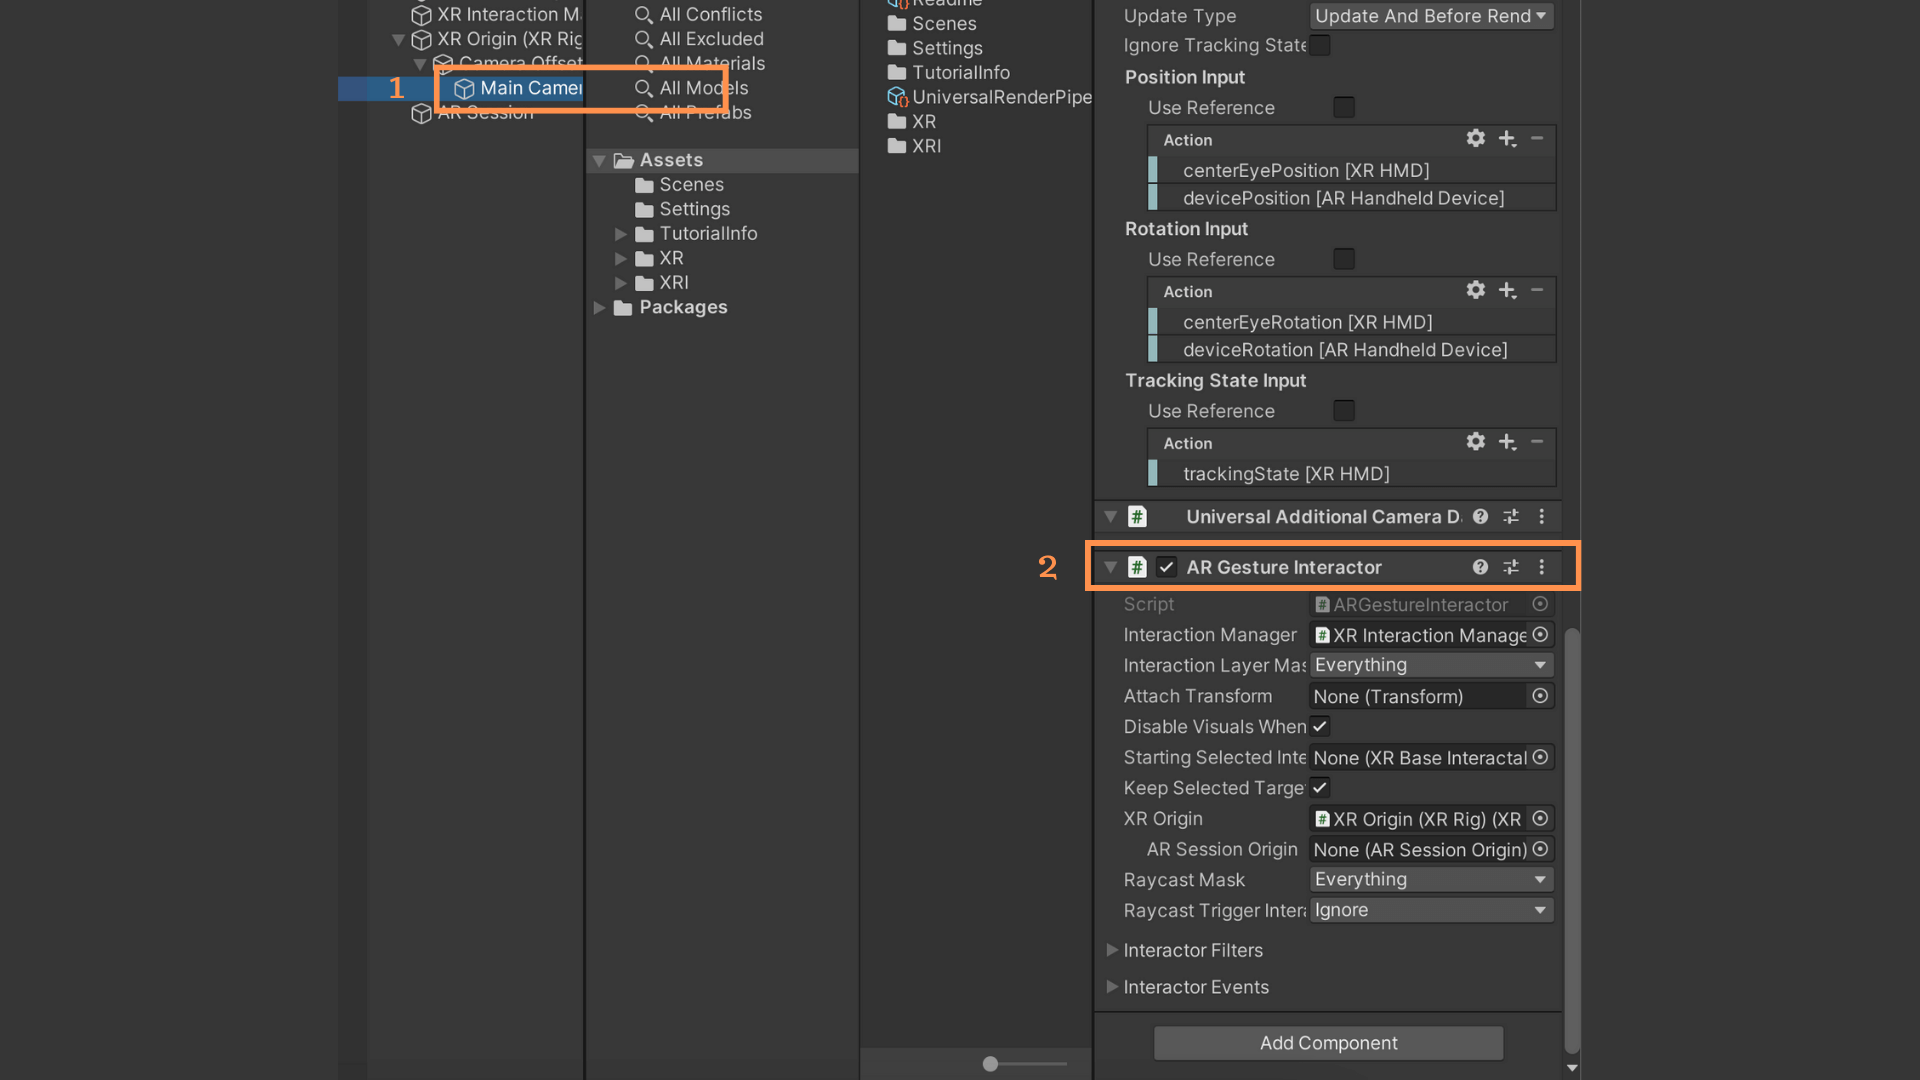
- Configure Main Camera:
-
- Expand the XR Origin (AR) object in the Hierarchy.
- Select the Main Camera to make adjustments specific to AR.
-
- Add AR Gesture Interaction:
-
- Add the ARGestureInteractor component to the Main Camera.
- In the ARGestureInteractor component, assign references to XROrigin and XR Interaction Manager.
-
- Add AR Default Plane:
-
- Right-click in the scene hierarchy.
- Go to XR > AR Default Plane and add it to the scene.
- Create a prefab by dragging it into the Prefabs folder for future use.
-

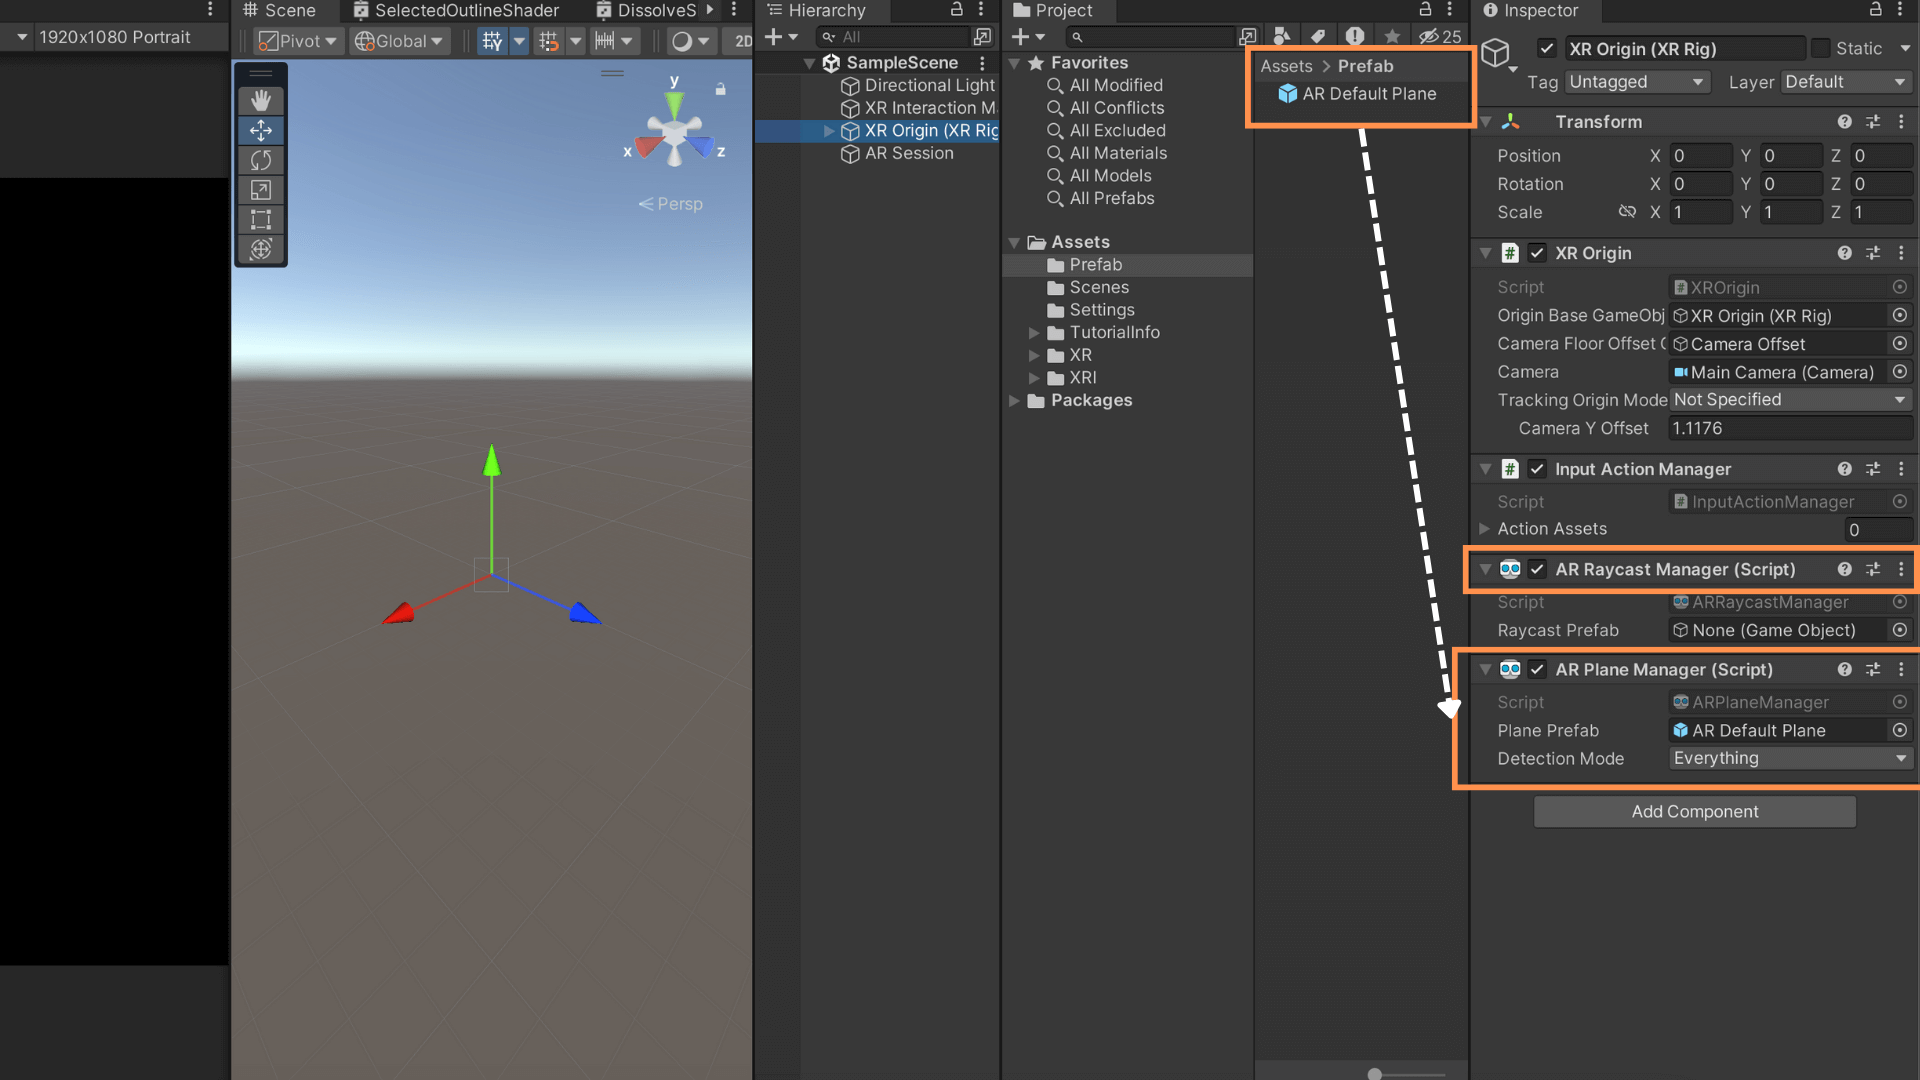
- Configure AR Plane Manager:
-
- Select the XROrigin object in the Hierarchy.
- Add the AR Raycast Manager and AR Plane Manager components.
- In the AR Plane Manager component, reference the ARDefaultPlane prefab.
-
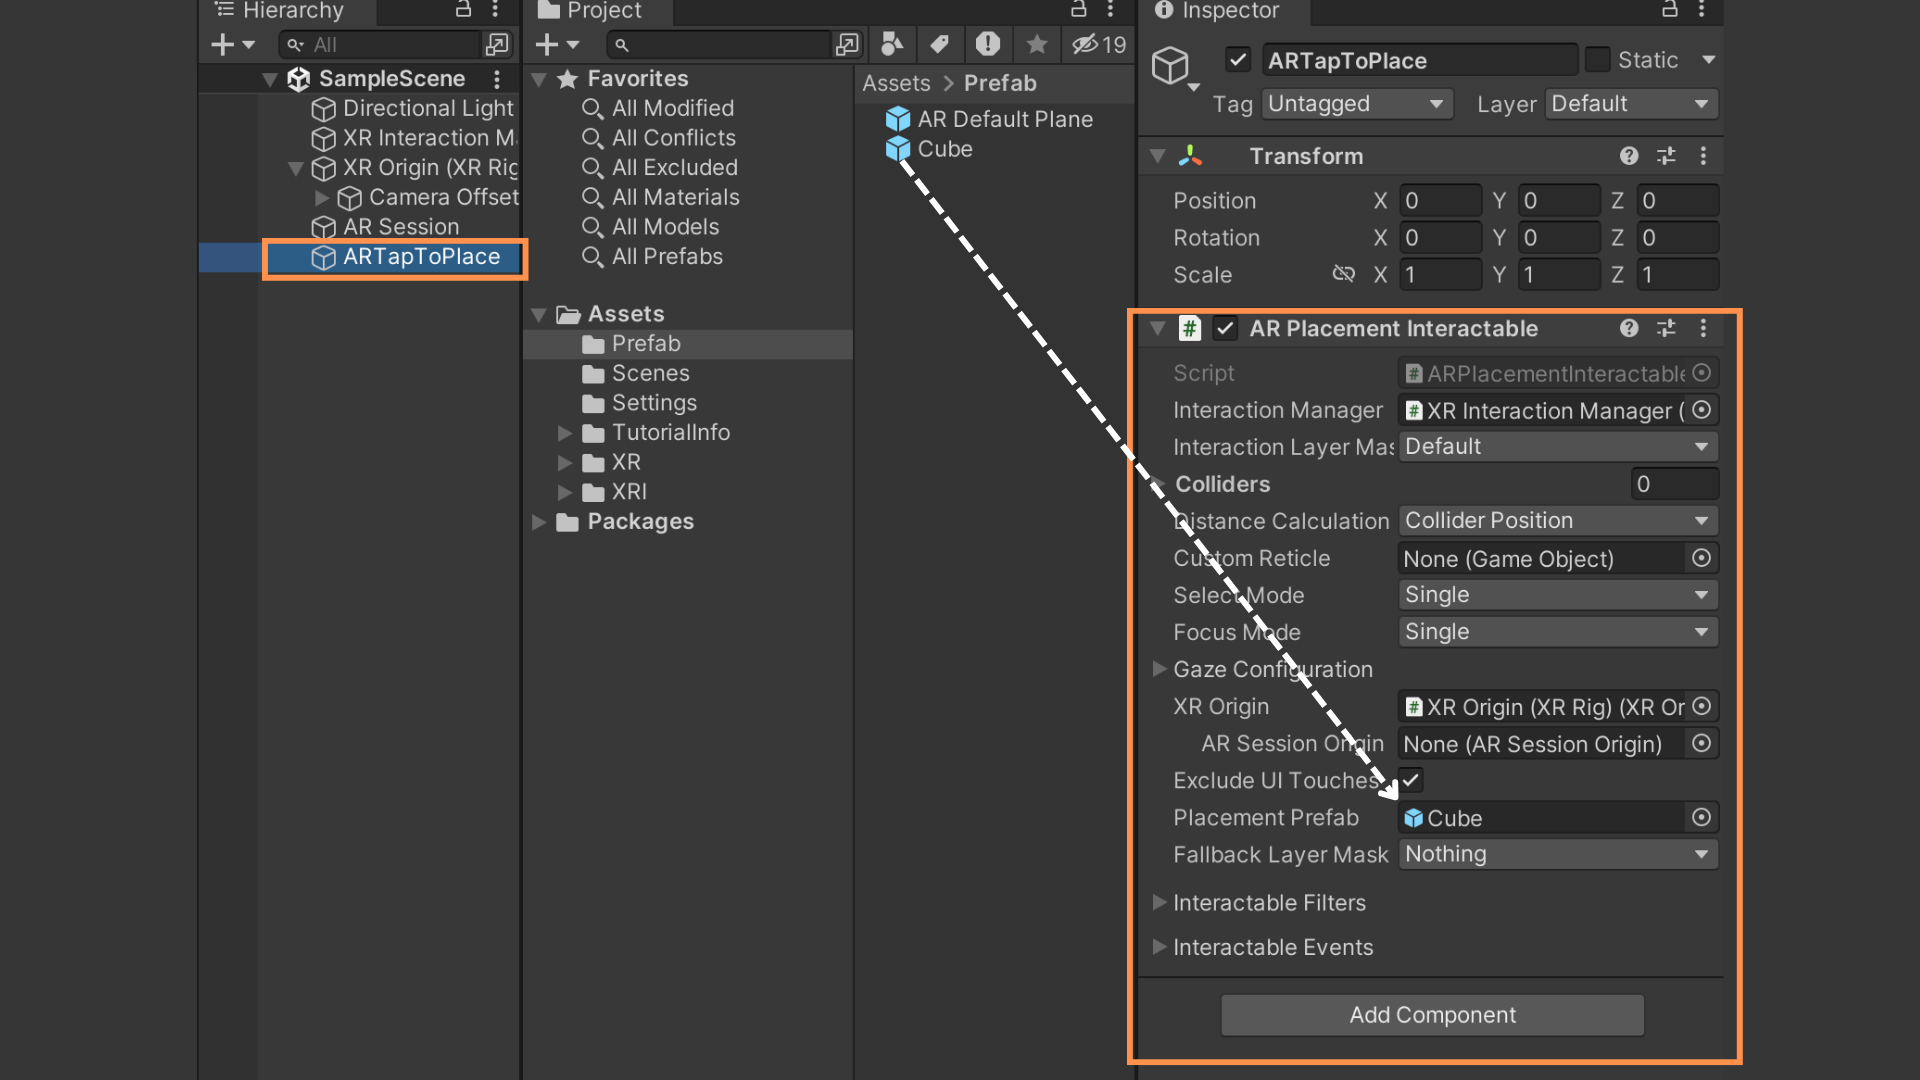
- Create Placement Object:
-
- Right-click in the scene hierarchy.
- Create an empty object and give it a name (e.g., ARTapToPlace).
- Add the AR Placement Interactable component to this object.
- In the component, reference XROrigin, Interaction Manager, and the Placement Prefab (the object you want to place).
-
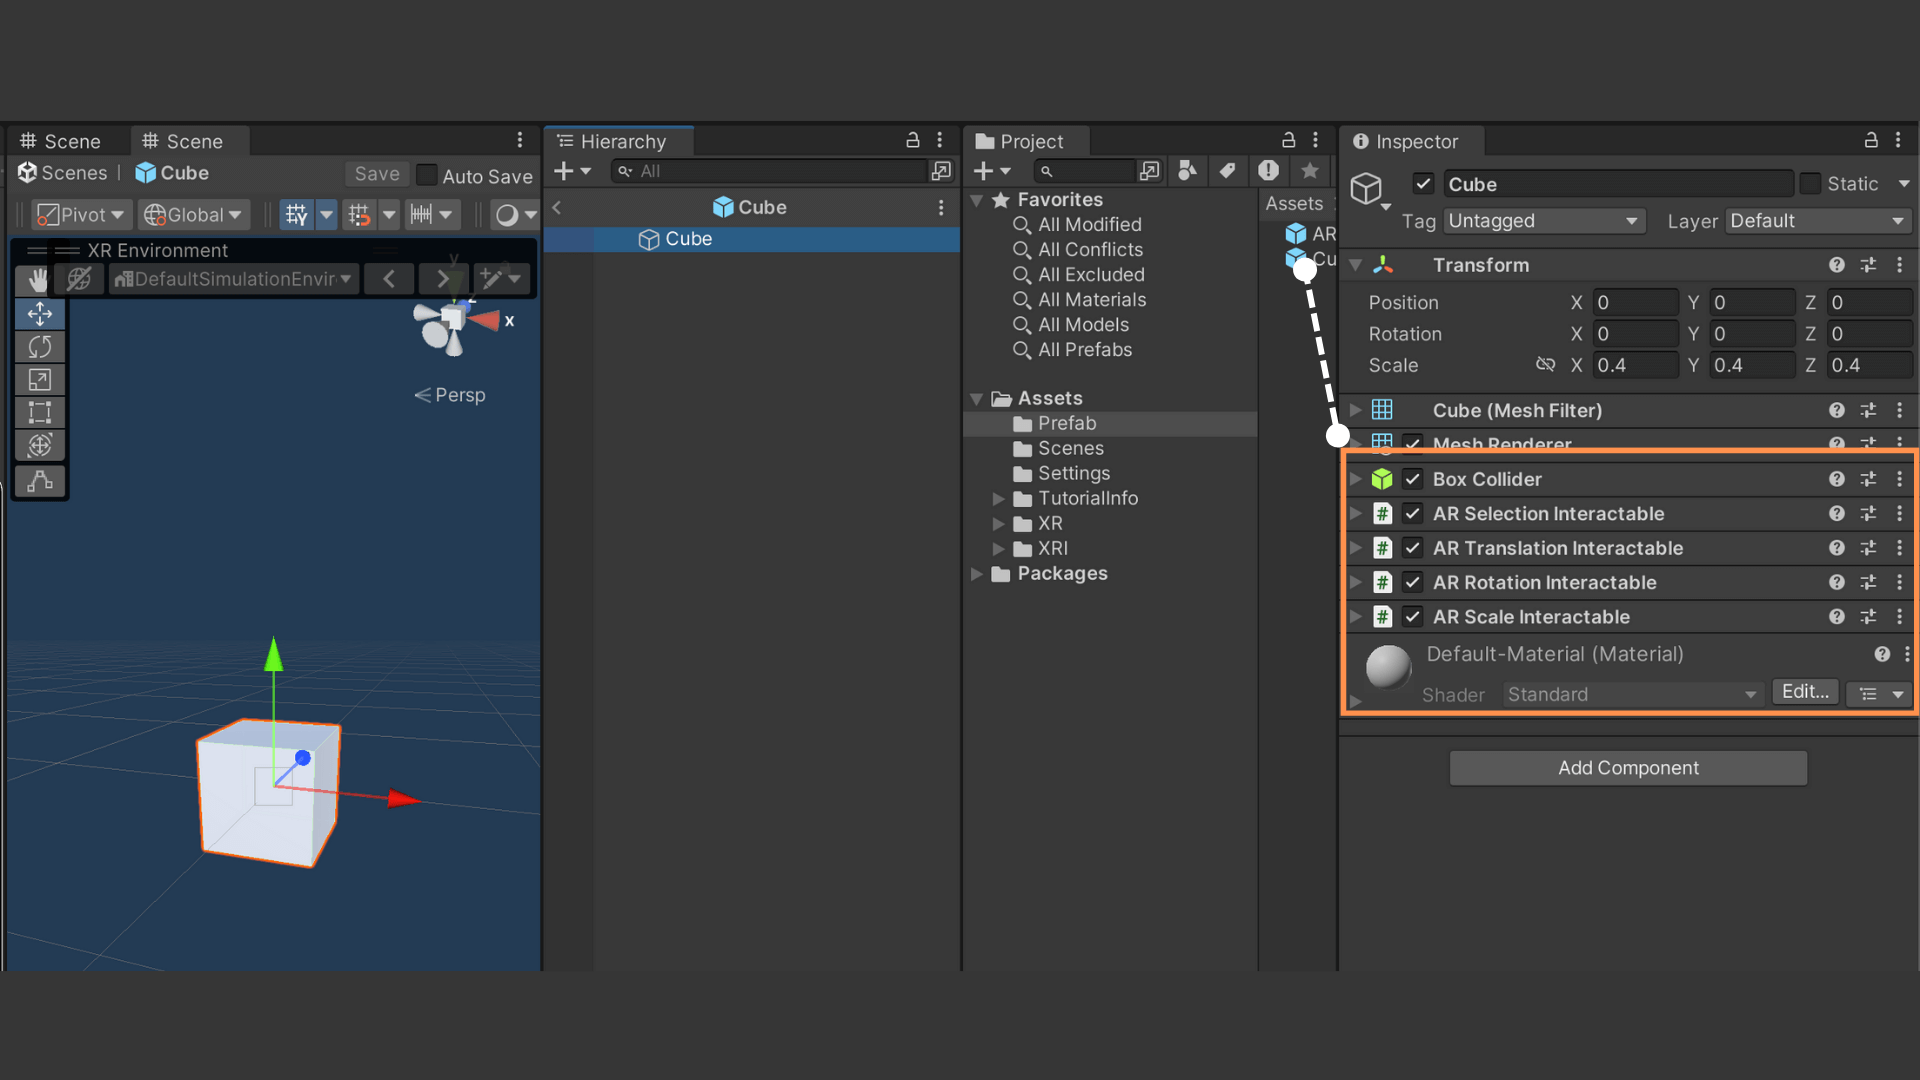
- Manipulate AR Object:
-
- For objects you want to manipulate:
- Add ARTranslationInteractable for movement.
- Add ARRotationInteractable for rotation.
- Add ARScaleInteractable for scaling.
-
- Build APK:
- Back in the Build Settings window, click on the Build button.
- Choose a location to save your APK file.
- Run and Test:
- Install the APK on your Android Device.
- Test the TapToPlace object interaction in the built application, After Placing object you can test Drag, Rotation and Scale Operation.